Invisible Setting Procedure
Invisible setting is different in the sense as it requires special
preparation of the diamonds to be set. Grooves have to be cut into each
diamond’s girdle and diamonds are set in such a manner that metal is not
visible between diamonds. But this requires great skills and only
experienced setters can set diamonds in invisible setting to perfection.
Setting Procedure
Here, I will discuss the procedure that is followed to set diamonds perfectly in invisible setting. We proceed from the stage where mounting is prepared and grooved stones have been acquired. The use of a microscope or 10X eye loupe is essential when working with the tight tolerances involved in the invisible setting process.
- Ready mounting is examined for any (structural or casting) defects. Correction is done if any faults are found in the mounting.
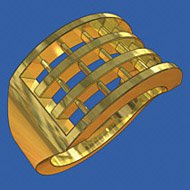 |
| Metal Frame |
- Before setting, diamonds to be set are studied carefully with a 10X loupe or microscope. Stones shouldn’t be damaged and grooves cut into the pavilion should be parallel.
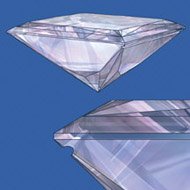 |
| Groove in Diamond |
- With the help of a digital micrometer, each stone's width is measured from girdle to girdle. Let’s say it comes out to be 4 mm.
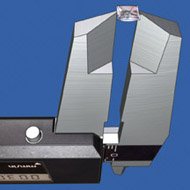 |
| Digital Micrometer |
- Mounting is measured from the center of each rail to ensure good fitting of stones. In this example, it should measure approximately 4.1 mm.
 |
| Rail Measurement |
- The parallel grooves are measured precisely. This determines the approximate inside width that the channel will be cut.
 |
| Grooves Measurement |
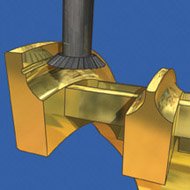
- With the help of a ball burr tool, starting with the center channel, the inside of the channel walls is enlarged. Channel opening should measure 0.01 mm less than the width of the parallel grooves on the stone.
 |
| Enlargement of Channel Walls |
- With a 90o square graver tool, top of the rails are shaped such that they resemble the letter V. Attention has to be paid to maintain a straight cut in the center of each rail.
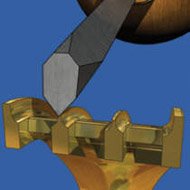 |
| Square Graver |
- Now this V-shaped cut is soften with a round graver tool. This makes it easier for the metal to expand into the grooves of the stones when stones are set.
 |
| Round Graver |
- Before setting the diamond in the seat, following is examined with the help of 10X loupe or a microscope:
- Surface of seat is smooth and even.
- Metal thickness is sufficient enough to secure the diamond and hold the diamond safely.
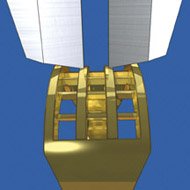
- Diamonds are laid in the center row. Adjust the inside width of the rails with a ball burr until the grooves on the stone clear the rails and fits into place.
 |
| Trial Fitting |
- Outer channel walls are undercut using a hart burr tool
 |
| Cutting of Outer Channel Wall |
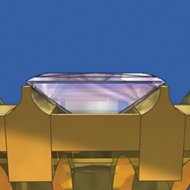
- Stones are trial fitted into each row, starting with the center row. If stones don’t fit comfortably and at required depth, changes will be required. It’s important that diamond fits well and there should not be any visible gap between diamonds from top.
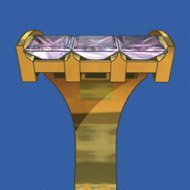 |
| Trai Fitting of Diamonds |
- Diamonds are placed individually and each stone's location is tracked while trial fitting. Place the first diamond, wax it in place then start with other diamond.
- Before proceeding further, all stones have to be inspected using a 10x loupe or microscope to confirm following:
- Tables of all the diamonds in rows are even and at same level.
- There are no gaps between the stones.
- Stones don’t overlap each other. Corners of such specially grooved stones are very delicate, if they are too close and overlapping each other then corners will chip-off or break.
 |
| Inspection of Overlapping of Diamonds |
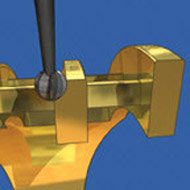
- Finally, stage is set to set the diamonds. Using a chopstick or small wooden dowel as a punch, stones are tapped lightly with a chasing hammer. The downward force causes the thin tips of the rails to flare outward, filling the grooves and locking the stone in place. Be very patient during this step as any hurry or any extra amount of pressure can break the fragile corner of diamond.
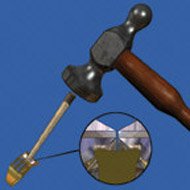 |
| Tapping of Diamonds |
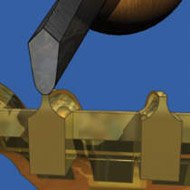
- Outer channel walls are tapped to secure the stones in place. Any hurry at this stage might damage the diamonds and will spoil your work done so far.
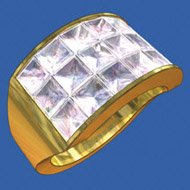 |
| Final Checking |
- Wax is removed by either steam or ultrasonic cleaning. After removing wax, the stones might become loose, so re-tightening is required.
Return from Invisible Setting Procedure to Invisible Setting page
Return from Invisible Setting Procedure to Diamond Jewelry Homepage
I hope you'll not mind sharing this on Twitter, Facebook and with everyone else :)
Feel free to share if something is in your mind and want it to be covered on this site.
My Newsletter
Did you liked this article? Sign-up my FREE weekly newsletter and I'll send you more awesome new additions on this website along with latest jewelry happenings around the world, and download my Jewelry Design Album for FREE!